Processing My Own Film, a.k.a. Back in the Saddle Again

23 09 2014

Over the last couple of years, I have been rekindleing my love affair with film photography. This has been in no small part due to my brother’s enthusiasm for shooting film—lomo, instant or whatever he is into this week. Also, I love to listen to the Film Photography Project podcast. The gang on that show (what show?) just seem to live for photography, and as the name implies, they too are shooting film. Their enthusiasm for film is super contagious (and super positive).

A beautiful thing about film cameras is that, for the most part, nobody wants them. People practically give them away at garage sales, on Craiigslist, eBay, etc.. I have lusted over a Nikon F4s since I was in high school, but the $2,500 price tag in 1988 was just crazy talk. Now you can pick up an F4 for the price of a night on the town in Chicago. Now I have one. Of course, the F4 would be lonely all by itself, with just my old Nikon 5005 to hang out with. So I picked up a Nikon F and an F2 to keep the F4 company. Well one thing led to another, and now I also have a small stable of early Olympuses (Olympi?), a variety of rangefinders, medium format, and instant cameras.

These are no shelf jockeys though. They are out and about putting light to emulsion all the time, which brings me to the point of this post and the reason often cited for the popularity of digital photography—FILM COSTS MONEY. Memory cards? Not much.

I somehow have been lulled into thinking that shooting film is an inherently expensive thing to do. It can be. But I realized that it can also be pretty cheap. If you pay $5.00 for a roll of black and white film and $10.00 for processing, A few rolls of film starts to look pretty pricey. However, if you process your own film, it costs pennies per roll and is super easy. The cost of the film is the same, but not bad. Admittedly, printing still costs additional money, but if you want to print digital photos, you have to pay for that too—so that is a wash.

I used to process and print my own film when I was in college and I (probably) wasn’t any smarter back then than I am now, so I decided it was time to take the processing back into my own hands. For less than a hundred dollars, I got all the chemicals I needed, a developing tank, a changing bag and a film squeegee. The I went to the Home Goods store and picked up three measuring cups to dedicate to the chemicals, and some clips to hang the film to dry. All in, about a hundo.

Tonight I processed the first two rolls of film since college, and it was a piece of cake. I did use the awesome app on my phone  “The Massive Dev Chart” to give me the times I needed for each chemical. The app is worth EVERY PENNY. The only thing I might do differently in the future is get a bigger changing bag. It is pretty crowded in there with both of my paws, the developing tank, film and scissors.

Processing my own black and white film will let me shoot as much as I want and still seems like magic when I see it in action.  I will continue to send my color film out for processing and printing for the time being. Maybe someday…

Now I just need to find a good deal on an enlarger.


Lollapalooza Evacuated – Photos

5 08 2012

Chicago has, like the rest of the country, been in a drought all summer. Some heavy rain decided to show up once about a hundred thousand people were all packed into Chicago’s Grant Park for the mega-music festival, Lollapalooza. Officials decided to evacuate the whole deal until the storm passed. This turned out to be a really good idea. It was a pounder of a storm with lightning striking all around the area. The evacuees seemed to take the whole thing in stride, with some huddling under any available shelter, and others splashing in puddles like kids. The weather made for some great photographic opportunities too. Here are a few of the shots I took.

20120805-131844.jpg

20120805-131909.jpg

20120805-131931.jpg

20120805-131943.jpg

20120805-132009.jpg

20120805-132018.jpg

20120805-132029.jpg

20120805-132036.jpg


You Don’t Need a Camera to be a Professional Photographer

21 06 2012

Obviously you need a camera to take photographs professionally, but you don’t need to own a camera. If you are trying to break into photography as something more than a hobby, don’t rush out and buy a lot of expensive gear (sorry, gear manufacturers). You can rent everything necessary for your photo shoot. Unless you are shooting all the time and getting paid for it, the return on investment for a $5,000 lens and $6,000 body could be many years, or never.
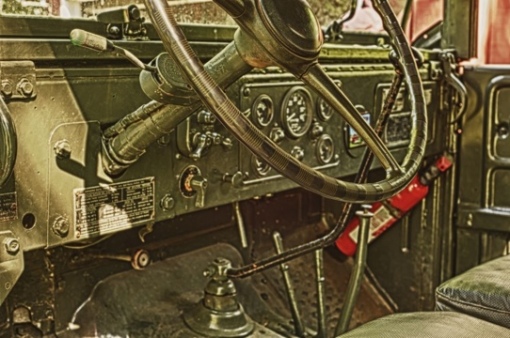
If, for example, you shoot street photography most of the time with your SLR, rangefinder, point-and-shoot camera or even your phone camera, it doesn’t make sense to have a $20,000 medium format camera in your closet for the handful of product shots you do on the side. If you get a job that you need specific equipment to shoot, include the rental price of the equipment into your job quote. Clients who hire photographers regularly are used to having rental line items on their invoices. The are presumably hiring you for your photographic vision and skill rather than your equipment inventory. It is unrealistic for a client to expect a photographer to have every piece of camera equipment that might one day be needed. Use this to your advantage. If you rent the gear and charge the client for the rental:
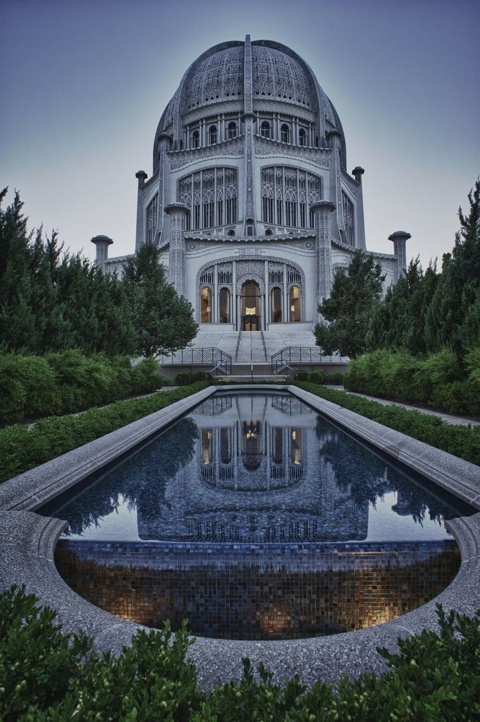
  • You can use the latest and best cameras, lenses, lights, etc. essentially for free
  • Your money is not tied up in assets that are collecting dust and you have better cash flow
  • You get a chance to “try before you buy” so you don’t make expensive mistakes
  • You can fulfill your photographic vision for the client without the excuse of having the wrong, or not enough equipment
  • If something happens to the equipment, it is covered by cheap damage waivers instead of increasing your insurance premiums

Most likely, you have a camera. Use it as much as possible. Even if you don’t use your own camera for jobs, the skills developed simply by using any camera are transferrable. The more solid your base skills are, the quicker and easier it will be to transition to equipment that you rent. 

Be sure to arrange for the rental gear to arrive a day or two early so that you have an opportunity to familiarize yourself with it before you are under the pressure of the actual job. Clients may not care if you rent gear, but they don’t want to pay for your time fumbling with camera settings you can’t figure out.

I rent my gear from Lensrentals.com and fully recommend them. They have a great website that is easy to use and very informative. Their customer service is impeccable, and their equipment is in top shape. There are plenty of other places to rent like Borrowlenses.com. If you live in a larger city, you probably have local rental options as well. Calumet and Helix are two available here in Chicago.

Save yourself a bundle and improve your odds for making it as a pro photographer by renting your gear. You will figure out (using your most objective inner voice) which gear it really makes sense to own, and you can make a more informed decision about your purchases if you have rented the gear previously.


The Gould Bay Emperor Penguin Colony, Antarctica

30 01 2012
lunchtime

Emperor Penguin adult and chick

Some things in life make you feel like you have won the lottery. In my case, the chance to visit a colony of Emperor Penguins in Antarctica gave me just that feeling. I was in Antarctica to guide a group to the Geographic South Pole for a great company called Polar Explorers. We chartered a flight to the penguin colony for some of our group and I was fortunate to get the chance to escort the group for the day.

Basler BT-67

Some of the group in front of the Basler BT-67

We flew a few hours from the Union Glacier  base camp in a ski-equiped, Basler BT-67 to a location on the sea ice on Gould Bay, about a mile from the colony. We landed between a couple of huge icebergs frozen into the ice.

Hiking to the penguins

Walking to the penguins from the landing spot

We hoofed it for the mile over to the spot where the penguins were gathered. What a sight! From a distance, you would swear there were a bunch of people shuffling around. We tried to keep a distance of 5 meters from the penguins, but they were so curious, they would waddle right up to you.

Even more chicks

Fuzzy gang of penguin chicks

We weren’t required to run away from them, but could not approach them. They have no land predators in Antarctica, so the penguins did not view us as any kind of threat.

Penguin Close Encounter

Hard to believe how unafraid the penguins are

I have to say the penguin chicks are just about the cutest thing you can imagine. It was all you could do to resist stuffing a few into your camera bag to take home.

the smallest chick

The smallest chick I saw– about the size of a grapefruit

The chicks were about the size of an overinflated football, or maybe a bit longer, and they travelled around in these little gangs of grey down that made me giggle like an idiot.

More Chicks

Penguin chicks showing off


Off to school

The penguins would wander alone or in groups from one cluster of penguins to another

Regal Near and Far

Some penguins waddle, some slide

The adults were about waist height and very regal. They would alternate between waddling along and sliding on their bellies.

Penguins on their bellies

Two adult Emperor penguins and one chick

The sliding looked a lot more efficient to me, but I suppose they can see a bit farther when standing and it is probably warmer not laying on the ice. The sound of the colony was a cacophony of honks and chirps. I made a short audio recording of the penguins. Listen to it here: 

Happy Feet

The penguins' feet look almost reptilian

Penguin Headshot

Closeup adult Emperor Penguin

2 chicks

Acouple Emperor Penguin chicks about the size of a football

I brought a few lenses with me to shoot the penguin colony, but I ended up shooting almost everything with a Nikon 70-210mm f/4–5.6 on a D700.  I recorded the audio with a Roland Edirol R-09HR digital recorderI think if I could do it again, I would have 2 bodies (full frame sensor) with a 300mm f/2.8 on one and a 24–70mm f/2.8 on the other. I would bring a 1 and 2 stop neutral density filter for each or a variable neutral density filter so I could get 3 stops wider open in the bright sun. A flash would have been great, but I am afraid it would be too disruptive/stressful for the penguins. If I was going to be there for a couple of days, I would bring a body that could shoot video also and a tripod with a fluid head. I would also add a shogun mike to my Roland recorder.

My camera kit was necessarily light for this trip, since it was not a photography trip, but rather a ski trip. We were to be skiing with our camping gear in sleds pulled behind us on our approach to the geographic South Pole, so camera equipment with its weight and volume was something of a luxury item. As the guide for the trip, I had to (rightfully) put the team and its needs in front of any desires I had to make photographs. Therefore, I only brought a Nikon D700 body, three lenses (20mm, 50mm, 70–210mm), and a Canon G10 point and shoot for basic video and pocketable convenience. The lens selection was pretty good overall, but I really didn’t use the 20mm with the penguins and I didn’t use the 70–210mm for the ski trip.  For a trip where I had to travel light and cover a range of situations, this kit suited me well.

incoming

Curious little penguin chicks


My Radio Interview from the South Pole

22 12 2011

Actual Geographic South Pole Marker, 2011

This is my interview with Radio New Zealand from the South Pole. I was there guiding a 20K ski trip for PolarExplorers. Click the link below to hear the interview:

mp3 of Interview


Big Day at the Bottom of the World

21 12 2011

The centennial anniversary of Roald Amundsen and his team reaching the Geographic South Pole on December 14, 1911 was celebrated last week with people from all corners of the Earth in attendance. Toasting a great accomplishment for Norway and humanity, the Norwegian Prime Minister, Jens Stoltenberg, Explorer, Børge Ousland and officials from the Norwegian Polar Institute and the NSF each addressed the crowd. At  – 35° C,  fingers were cold holding the camera.

Antarctica is as photogenic as it is inhospitable to human life. The effort required to get there is easily paid back in memories.

I was on this trip as a guide for PolarExplorers.com.

Ilyushin IL-76 on the blue ice runway at Union Glacier, Antarctica

Norwegian expeditioner with cognac from 1911. Mmmm.

Reflecting globe atop ceremonial South pole

Sleeping in a recreation of Amundsen's tent

Refueling at Theil Mountains fuel cache

Norwegian Prime Minister, Jens Stoltenberg and Rick Sweitzer

Re-enactment of Bjaaland's famous photo of Amundsen's team at the South Pole

Me with ice sculpture of Amundsen at the Pole

Me at the Centennial celebration

Bluebird day at the South Pole

Ilyushin back in Punta Arenas, Chile at the end of the trip


Do You Need a Google+ Invite? Holla!

20 07 2011

I could not help but feel like the curious little monkey whose best friend is the man with the yellow hat as I read post after post about Google+ on blogs, tweets and websites. I pleaded with others to grant me access to this new time-draining realm of  the electronic water cooler (thank you Andy for the invite!). Now that I have gained access, I am eager to start capturing the potential of the site. I have no doubt that Google+ will become a new stop on my daily computer commute through the countryside of the internet. When I have tweaked my profile a bit, I’ll announce my GRAND OPENING! Surely you can’t wait. Until then, if you want a Google+ invite, click on over to dirkjensenphotography.com and click the “contact” link. Email me a request with “Google+ invite” in the subject line and I will send out invites until Google shuts me down. Be sure to add me to your circles, I look forward to seeing you in a hangout in the future. My Google + URL is

https://plus.google.com/110123743477748462345

Catchy, no?


My Traditional Photography Will Beat Up Your HDR Photography! Nyah Nyah, Nyah!

9 07 2011

20110709-225559.jpg

Nobody likes a good fight more than a photographer. Almost any topic regarding photography will raise the the hackles of a shutterbugs. Just go tell a Nikon shooter that Canon makes a better system, or suggest to a group of photographers that a real photographer only uses natural light and never crops an image (be prepared to run for cover). Fighting tendencies notwithstanding, for some reason, I am surprised about how up in arms some folks get about HDR photography.

HDR stands for “high dynamic range” and is a technique for producing an image that captures a range of light values in an image wider than would normally be possible in a single image. A series of photographs are shot with only the exposure changed in each one—exposing for the highest highlights at one end of the exposure range and the darkest shadows at the other end. The images are composited using software and the result is an image that shows dark shadows and bright highlights at the same time.

Unlike the eye, the camera is, and has always been, limited to a relatively small dynamic range of exposure. Overcoming that limitation has been one of the fundamental challenges to photographers. It has previously been necessary to decide if you wanted to maintain detail in the highlights or shadows in an image. The ability to overcome that limitation or to exploit it has defined the careers of thousands of photographers since the first light hit emulsion so long ago.

The super incredible human eye can see and process a much wider range of light to dark than a camera can. While HDR images can simulate our eye’s dynamic range, it doesn’t duplicate it. There is something that happens neurologically that interprets what we see in in everyday life in a way that (obviously) makes perfect sense, i.e. It looks “real.” Somehow, the HDR image often seems “unreal” as if the mind can’t recognize a photograph with a wide dynamic range the way it does with real scenes.

20110709-225859.jpg

Now that we have the ability to create an image with a wider exposure range, it makes sense that that would be the superior photographic technique. But there is something hard to define about a “normal” photo that often makes it seem more comfortable and natural to look at than a HDR photo. Digital photography is still held up to film photography for comparison, with current digital technology arguably meeting or exceeding film quality. “Traditional” digital photography vs. HDR photography could be compared to the visual difference between a movie shot on film and one shot in HD. The movie shot in HD sometimes has a hyperreal look to it that the film doesn’t have. If digital photography has strived to simulate the analogue look of film, then HDR images could be seen as a step backwards in photographic evolution. There is no denying that HDR images can be visually arresting. Perhaps the very fact that they do not look a film image earns them a label of non-photographic. This is, in my opinion, ridiculous.

20110709-230113.jpg

To claim that HDR images lack merit because they look different or they use a different technique for their creation, can be compared to movements in painting. The realist movement criticized the impressionist movement. Many put realism as a style on a pedestal as beyond reproach. The impressionists’ paintings were brash and unorthodox, appearing to have a lack of skill or control as defined by a desire for a painterly look that imitates reality rather than interpreting it. The impressionist paintings did not appear to be “real” paintings because they were not “realistic.” Similarly, HDR images are often seen as not being “real” photographs. Of course, no photograph is anything more than the photographer’s interpretation of a fractional slice of time captured by the camera. The position and angle of the camera, the choice of lens, aperture and shutter speed, and the decision of when to release the shutter all put the fingerprint of the photographer on the photograph and define the image as an interpretation of reality rather than a copy of reality. The impressionists captured a view of the world unique to each artist that has come to be accepted and celebrated as brilliant in its own right. I have no doubt that HDR photography will one day similarly be seen as an important movement in the history of photography.

I am the first to admit that there is a lot of bad HDR photography being made. But there is certainly a lot more bad “traditional” photography being made at the same time. I think it is important to hang up the boxing gloves on the subject and recognize HDR photography for what it is—a means of self expression for photographers to share their vision with others. Not better, not worse, just different. I mean, it’s not like we are comparing the obviously superior Nikon to Canon.

Just kidding.

Maybe.

20110709-230316.jpg

P.S. All the images in this post are HDR images.


10 Tips for Great Firework Photography

1 07 2011

20110701-103740.jpg

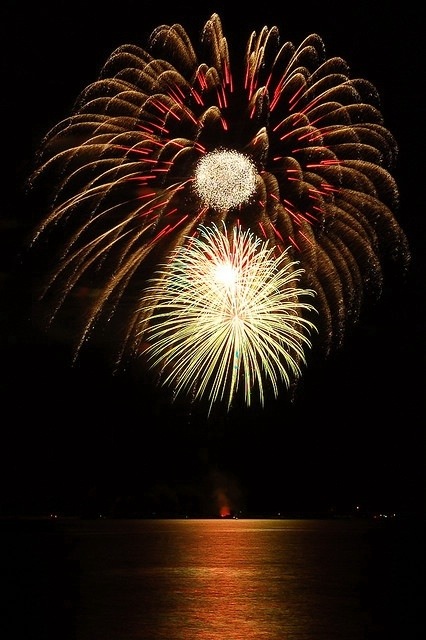
Fireworks are a once-a-year event for most people that provide an exciting photo opportunity. They are not too hard to capture if you keep a few things in mind. This information is most useful for SLR or DSLR users, but much of it will apply to point and shoot cameras also.

1. Use a tripod. You can photograph fireworks without one, but the results will be more like artistic light trails than recognizable as fireworks.

2. Use a remote shutter release. You are going to want to use the “Bulb” setting on your camera, and it is a lot easier with a wired or wireless shutter release.

3. Put your camera in “Manual” mode. You don’t want your camera to make adjustments to your settings without your input.

4. Set the shutter speed to “Bulb.” This will give you the most control over your shots. You will use the above mentioned remote shutter release to open and close the shutter.

5. Set your aperture somewhere in the middle of the lens’ range around f/8.

6. Put your camera’s focus setting on manual and focus your camera to infinity.

7. Set your ISO to 100 or 200. Fireworks are really bright!

8. Arrive early enough to get a good unobstructed view. Set up you tripod and camera and roughly frame your shot. You can make adjustments after the fireworks start to fly. Consider including foreground elements that make interesting silhouettes or water for beautiful reflections.

9. When the fireworks launch, give it a moment or two to get up in the air, then release the shutter. Hold down the remote shutter release until the firework has faded and close the shutter ( let go of the shutter release button). It may take a few fireworks to work out the timing, but you will see it is pretty easy. Check your image on the LCD to see if you like the framing. If it looks good, fire away.

10. Remember that the fireworks are a family event and kids will be everywhere, so try to set up where your tripod won’t be in the way of others. This is meant to be fun for everyone, so be courteous to those around you and have a great time.

Have a great holiday and get some great shots!


Double Dutch—The Blackrapid RS DR-1 Double Camera Strap Review

25 05 2011

It may seem hard to imagine that you could get excited about a camera strap. Not long ago, I would have agreed with you. Now, all of that has changed. If you haven’t heard of Blackrapid, listen up.

20110525-165020.jpg

The Blackrapid camera straps come in a few different styles that all work on the same principle. The camera slides along the strap on a heavy-duty, steel swivel snap that clips onto a burly steel eyelet screwed into the tripod socket (of the camera or a long lens mount). The eyelet is backed by a rubber gasket that compresses against the camera body and makes it very unlikely that it would accidentally come unscrewed. Blackrapid recommends moistening the gasket before attaching it to the camera to get an even more snug fit.

20110525-165442.jpg

20110525-165456.jpg

20110525-165504.jpg

Instead of the camera resting against your stomach or ribs, the strap is slung across the body, like a messenger bag and the camera hangs at your hip. The double strap has loops that hang beneath each arm and connect at the shoulder pads. To shoot, you just drop your hand to your side, and the camera is right there. Slide the camera up in front of your eye and shoot away.

If the strap rotates around your body when you lift the camera, an ingeniously simple adjustable bumper on the strap will catch on the swivel snap as you lower the camera and rotate the luxurious shoulder pad back into place. The Blackrapid site has some great videos showing how this works.

The build quality of this gear insures that it will be with you a long time and hardware failure is not an issue.

The event I shot earlier this week was 250 people for 5 hours. Lots of running around was required with the typical heavy f/2.8 lenses on pro bodies. I shot the event alone, so I didn’t have anyone to shlep gear for me. it’s tiring just talking about it. I used the Blackrapid RS DR-1 Double Strap to hang one body on each side like a pair of six-guns.

20110525-170002.jpg

The DR-1 is essentially two of their single straps mated together (they can be separated and used as sigle straps too!). It has a strap between the shoulder blades to adjust the width, a fastex-buckeled strap across the chest and an elastic strap across the lower back to pull the cameras back and out of the way when they are not in use.

20110525-170125.jpg

The padded shoulders are similar in feel and look to backpack straps (minus the backpack) and are comfortable for a long shoot with a lot of weight.

Wedding/event/sports photographers and photojournalists will love this rig and benefit from the speed at which cameras can be changed without constantly worrying about a strap slipping off of your shoulder in the heat of the action.

For my last event, the double strap was invaluable without the aid of an assistant. I was able to have a very smooth rhythm moving from shot-to-shot and camera-to-camera — dropping one camera at my side as I simultaneously lifted the other from the other side. The bodies and lenses were not clunking together all night and I didn’t need to carry a bag.

With my 80-200 lens, the strap was attached to the lens’ tripod mount. That kept the camera and lens balanced more or less horizontally. I found that configuration more comfortable than the lens hanging straight down.

20110525-170409.jpg

For being outstanding in usefulness, ergonomics and build quality, I can recommend this product without reservations. This may be more camera strap than you will need, but it certainly won’t be less.

Check out the RS DR-1 and their other great products at www.blackrapid.com.